Guide to setup and run an API agent from a cloud based service
Amazon Web Services (AWS)
Step 1: Set up an instance
Login to your AWS account. If you don’t have one, you can create one, the free plan is sufficient.
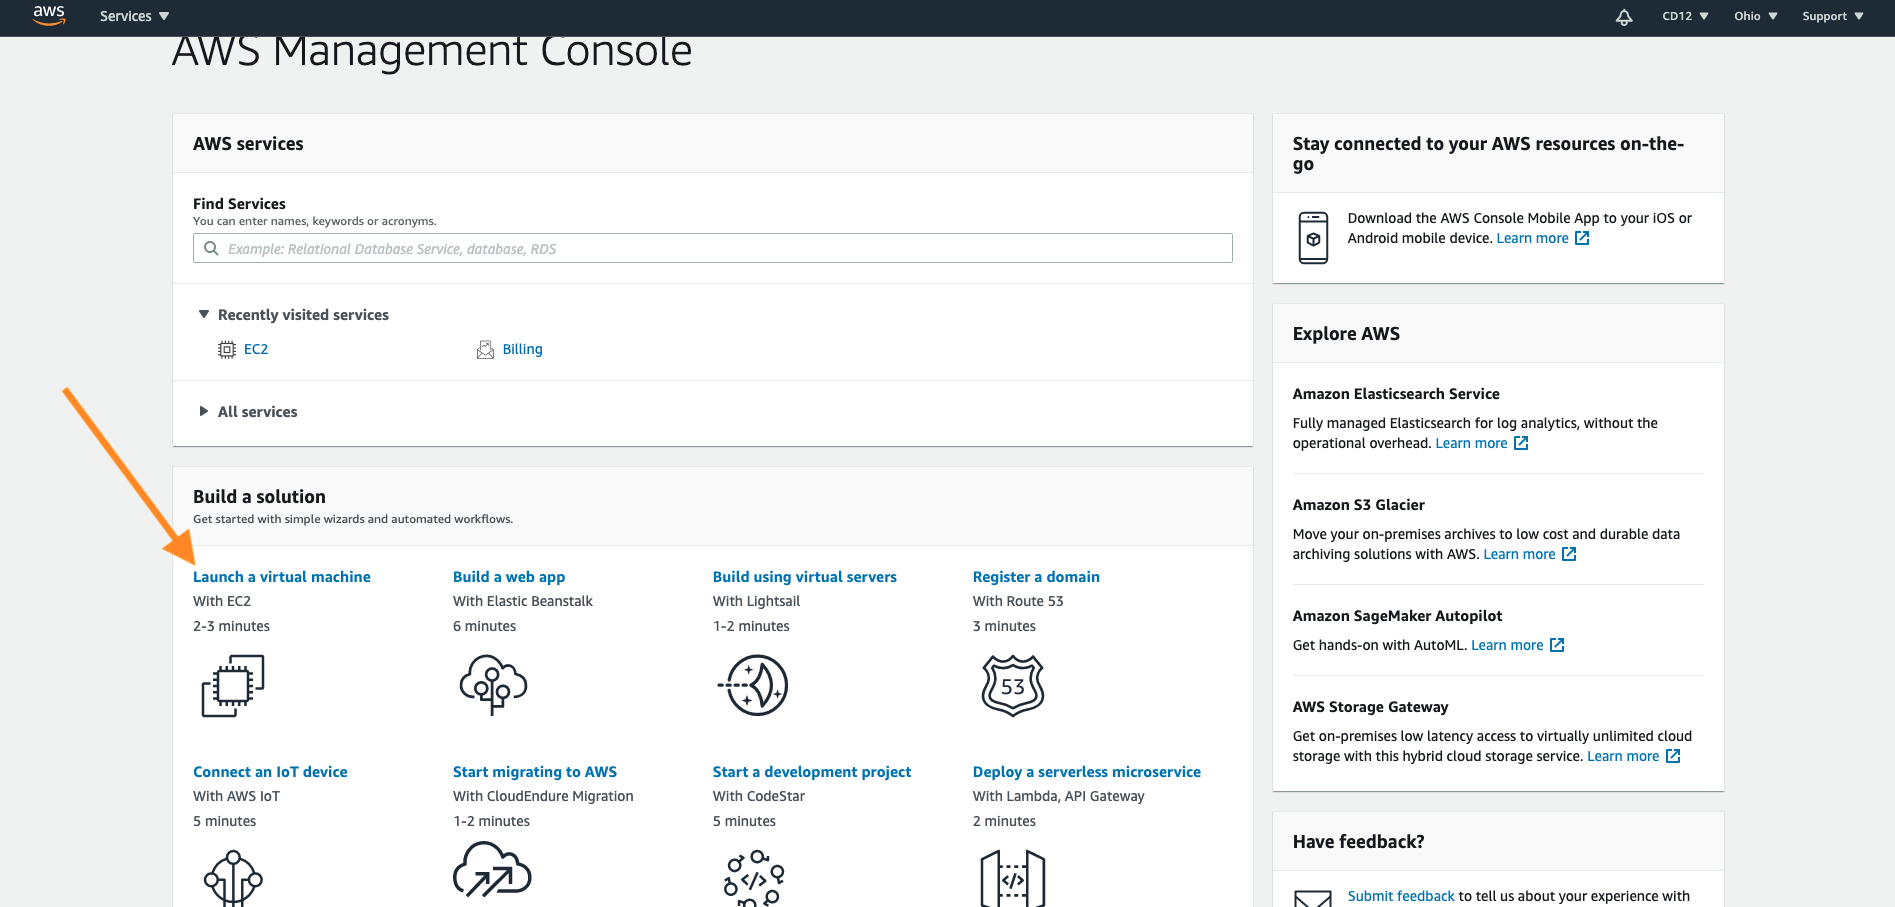
Create a virtual machine.
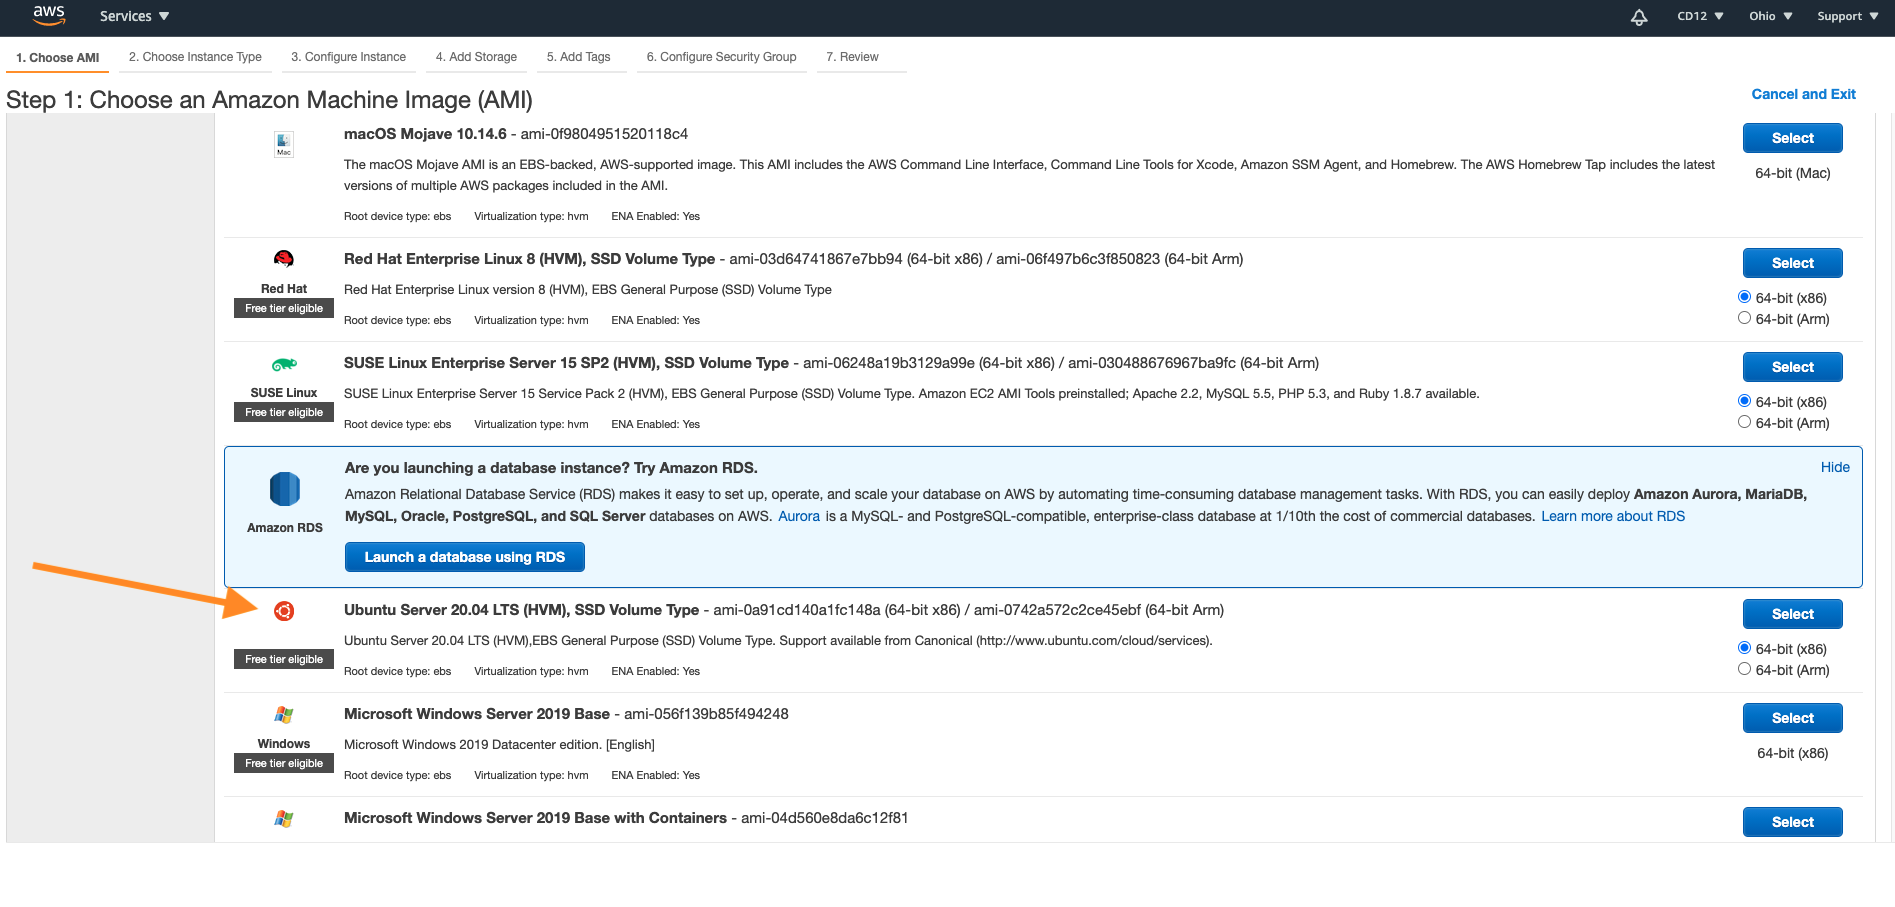
Select an AMI. We strongly recommend using Ubuntu Server 20.04 LTS (HVM), SSD Volume Type
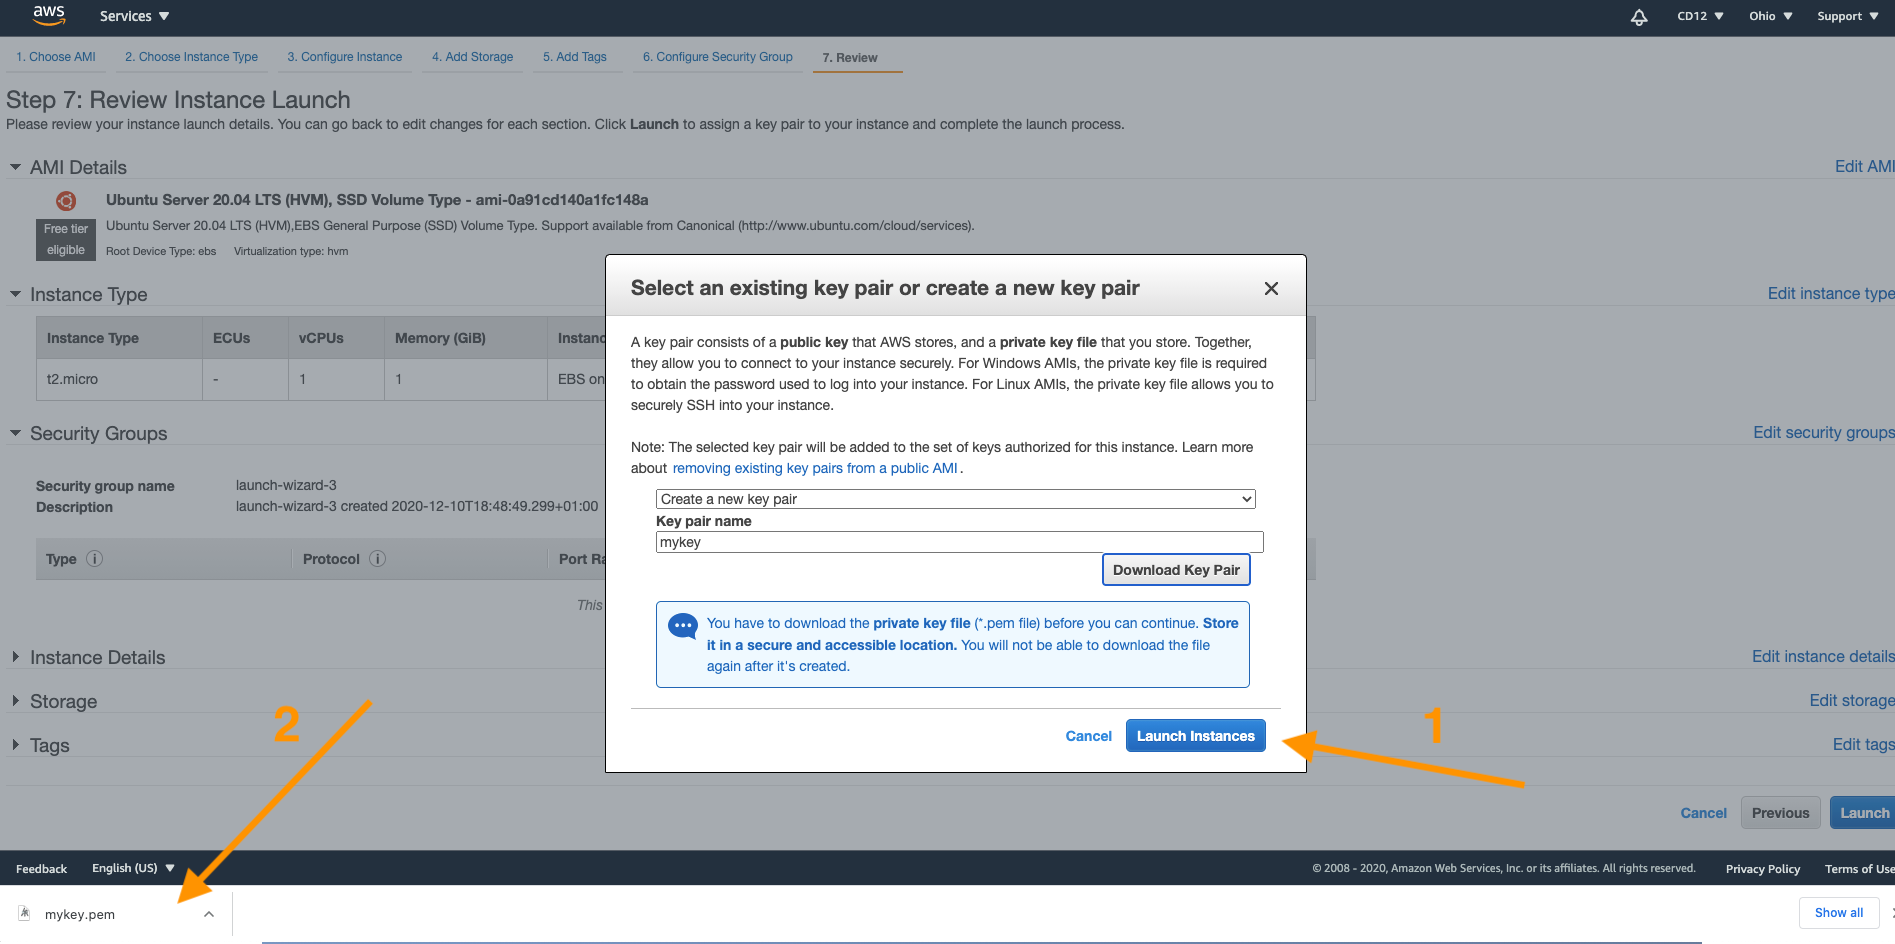
Choose instance type t2.micro 1vcpus and 1GiB and click on review and launch
Create a new ssh key and download it on your local machine. The key file’s format is .pem
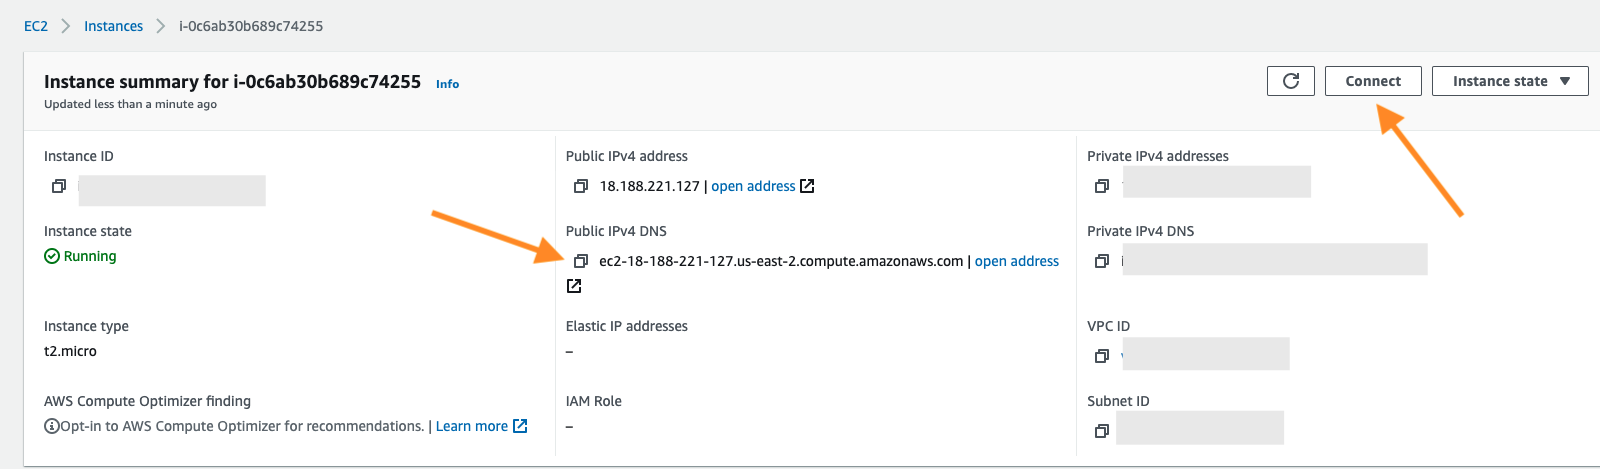
Now you need to copy your scripts/files from your local computer onto your AWS instance. To do that you need to connect to your instance by using the ssh key and your public DNS. You can find the DNS of your instance by selecting your instance and looking at the summary
First you need to make sure your key is not publicly available on your machine. Run the following command
chmod 400 path_to/mykey.pem
Step 2: Upload relevant files onto the instance
To copy a file into your AWS instance please run the equivalent command (with your own information)
scp -i path_to_ssh_key.pem path_to_file username@public_DNS:/path_to_copy
The username can be found after clicking on connect. The default username will depend on the instance platform you are using. If you are using Linux, “ubuntu” will be the default username.
Additionally we recommend copying your files into the home directory of your instance /home/ubuntu.
Here is an example of command
scp -i Desktop/mykey.pem myscript.py ubuntu@ec2-18-188-221-121.us-east-2.compute.amazonaws.com:/home/ubuntu/
Step 3: Connect to the instance
Once you have copied all necessary files onto you AWS instance you can connect to your instance with 2 ways
- Directly with the AWS terminal cli that you can access by clicking on connect on your
EC2 instance connect - With your local terminal cli (recommended)
To connect to your instance from your local terminal you just need to run the following command with your equivalent information
ssh -i path_to/mykey.pem username@public_DNS
Example
ssh -i Desktop/mykey.pem ubuntu@ec2-18-188-221-121.us-east-2.compute.amazonaws.com
Once connected, go into the directory you have previously sent your files. If you have copied them in /home/ubuntu, just run the following command
cd /home/ubuntu
You can list all the files in the directory, to confirm that your files are correctly copied onto the instance by running
ls
Step 4: Initialize the instance's environment and install Grid Singularity Client
Update and install all required package on your AWS instance
Update your sudo
sudo apt update
Install python3 pip
sudo apt install python3-pip
Add deadnakes to your system source
sudo add-apt-repository ppa:deadsnakes/ppa
Install python 3.6
sudo apt-get install python3.6
Install virtual environment
sudo apt install python3-virtualenv
Create a virtual environment with python 3.6
virtualenv /tmp/d3a --python=/usr/bin/python3.6
Activate your virtual environment
source /tmp/d3a/bin/activate
Install d3a api client
pip3 install git+https://github.com/gridsingularity/d3a-api-client.git
Step 5: Install screen and run the API agent
To be able to run the script indefinitely on your AWS instance you need to install Linux Screen (that allows to have multiple screen within your terminal) with the following command
sudo apt-get install screen
Create a new screen
screen -S screen_name
Run your python script
python3 assets.py
To detach from the current screen session
Ctr+a+d
If you want to log back in the relevant screen run
screen -r screen_name
Once you are detached for the running screen you are able to close your terminal and your script will continue to run indefinitely on your AWS instance